Laser Scanning Site Prep Checklist
Good site prep means three things are settled before the field team arrives: the spaces in scope are reachable, the surfaces you care about are visible, and someone on site can move the team through the building without stopping for keys or escorts. Nail those, and a 3D laser scanning day captures what your deliverable needs in one pass. Miss them, and you get a partial dataset, a return trip, or modeled geometry built on guesses. This checklist is written for owners, architects, engineers, facility managers, and contractors getting a site ready for a scan.
The reason prep matters so much is that a scan day is a fixed block of time. Our crews run a survey-grade terrestrial scanner, and a full day on site can stretch to roughly twelve hours of setups, moves, and target placement. The scanner records only what it can see from each position, and every locked door or blocked wall either burns time or leaves a hole in the point cloud. You cannot fix an unscanned room in post-processing. So the work below is about removing the small obstacles that quietly eat a field day.
Start with the deliverable, not the building
Before anyone schedules a truck, decide what you actually need after the scan. The field plan follows the deliverable, not the other way around.
If you need a registered point cloud, the crew plans enough scan positions and overlap to tie areas together cleanly. If you need floor plans, elevations, or reflected ceiling plans, the route prioritizes those exact surfaces. If you need a Revit model, the team needs unobstructed line of sight to the geometry that will be modeled, including above-ceiling conditions if those are in scope. A scan optimized for a shell-only LOD 200 model is not the same scan you would run for dense MEP at LOD 350.
So before scan day, get clear answers on a handful of questions. What is the output: a point cloud, 2D drawings, a Revit or IFC model, a CAD package, or some combination? Which floors, rooms, facades, roofs, ceilings, or equipment areas are in scope, and which are explicitly out? Are concealed or above-ceiling conditions included? Is this interior, exterior, or both? Are there spaces that simply cannot be opened during normal hours? If you are unsure how output choices map to detail and price, our Scan-to-BIM LOD guide and the post on LOD 200 vs LOD 300 lay out the tradeoffs.
Access is the issue that derails scan days
Access is the single most common field problem, and it rarely shows up on a plan. A scan route looks simple on paper and still fails when the crew is standing outside a locked mechanical room with no one to open it. The fix is one named person on site who can open doors, answer basic questions, and walk the team through the building without long pauses. The table below covers what to confirm.
| Access item | Why it matters on scan day |
|---|---|
| Main entry and loading | The crew arrives with the scanner, tripods, spheres or targets, and rolling cases. A short, direct path in saves real time. |
| Locked rooms in scope | Electrical, mechanical, IT, storage, tenant spaces, and roof hatches are the rooms most often forgotten and most often in scope. |
| Vertical movement | Multi-floor work needs predictable elevator or stair access; a held elevator can strand a crew between floors. |
| Roof and exterior | Exterior and roof capture may need gate codes, roof-hatch keys, ladders, or advance security clearance. |
| Escort and security desk | If the front desk and any required escort are briefed in advance, the crew is scanning in minutes instead of waiting an hour in the lobby. |
If a room is out of scope, say so plainly. If it is in scope, make sure it can be opened the moment the crew reaches it.
Make the surfaces visible
Laser scanning is line-of-sight. The scanner captures exposed walls, floors, ceilings, structure, equipment, and objects it can see from each setup. It cannot see through stacked pallets, closed doors, covered walls, parked vehicles, or heavy clutter, and it cannot reconstruct what was hidden. You do not need a spotless building. You do need to remove the blind spots that would otherwise sit in your deliverable as a guess.
A short walk-through the day before usually does it. Pull temporary storage off the walls where wall geometry matters. Clear the corners that define room dimensions and floor plans. Open the doors that should be captured in relation to adjacent spaces. Move portable equipment away from fixed equipment where clearance is part of the scope. And flag any area that is normally blocked during business hours, so the crew can plan around it or schedule it for a quieter window.
A few surface types behave badly under a laser scanner, and it is worth flagging them up front: curtain wall and storefront glass, mirrors, polished stone, stainless and other glossy metal, deep black ceilings, wet or highly reflective floors, and dense vegetation against a facade. These produce weak or noisy returns. The data is still usable, but the crew may lean on surrounding geometry, field measurements, and reference photos to document those areas, and the modeling team should know to expect it.
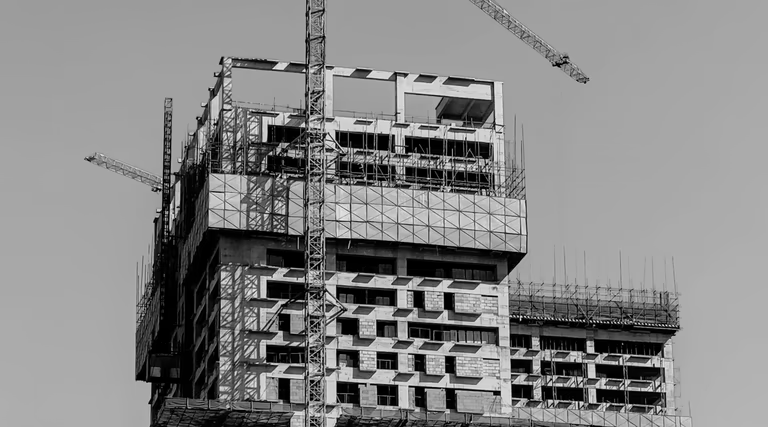
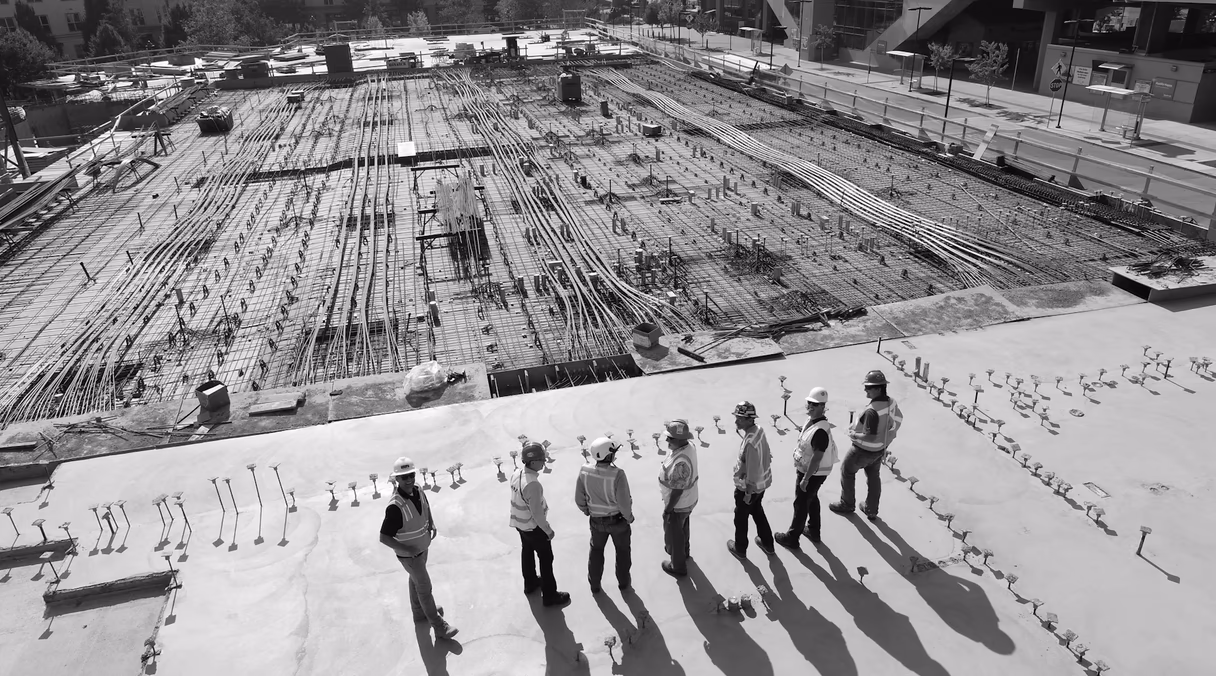
Occupied and active construction sites
Occupied buildings and live construction sites can be scanned, but movement is the enemy of clean data. People, lifts, carts, and forklifts crossing a setup create noise and gaps, and constant foot traffic slows every move. Sometimes that is acceptable; sometimes it defeats the point of the scan. Decide which condition you actually need documented, because a scan taken before walls close is a completely different record from one taken after finishes go in.
For these sites, confirm which trades are working during the window, whether lifts or scaffolds are in place, whether the work can happen before the shift starts or after it ends, which areas are unsafe or restricted, and what PPE is required beyond the standard hard hat, vest, and boots. Occupied and after-hours work also affects scheduling and cost, since off-hours labor typically carries an industry-standard premium. If the building has people in it, plan the scan around them rather than hoping they hold still.
What to send before the visit
Even rough information sharpens the plan and confirms the quote matches the site. Send the site address and entry instructions, the floor count and approximate area, any existing PDFs, CAD, or Revit files, marked-up scope plans, photos of unusual spaces, the access rules, the required deliverables, schedule constraints, safety requirements, and the name and phone number of the site escort. Existing drawings do not need to be accurate; they exist to orient the crew and catch scope gaps before the truck rolls, not to be trusted as measured. The scan replaces them.
Resist the urge to just scan everything
It is tempting to say “scan it all and we will figure it out later.” On a small space that can work. On a large or occupied site it backfires: more field hours, far more registration and processing time, and a heavy dataset nobody actually needs. Scope planning earns its keep most when only certain deliverables are required, access is limited, the building is occupied, above-ceiling conditions matter, exterior elevations are in play, the model has specific LOD boundaries, or several teams expect different outputs from the same capture. The better question is never “can you scan it?” It is “what has to be reliable after the scan?”
The scan-day checklist
Run this the day before the crew arrives:
- Confirm the scan date, arrival time, site contact, and phone number.
- Brief security or the front desk on who is arriving and when.
- Open every locked room that is in scope.
- Clear key walls, corners, doors, and equipment where you can.
- Identify anything unsafe, restricted, or out of scope.
- Share existing drawings or marked-up plans.
- Confirm whether interior photos are allowed.
- Confirm whether work can pause briefly in critical rooms.
- Confirm the final deliverable: point cloud (E57, RCP/RCS), DWG drawings, a Revit or IFC model, as-built documentation, or a mix.
That last line is the one that ties the whole day together. The crew plans the capture around the files you name, and the point cloud registration - part of our 3D laser scanning service and modeling teams downstream inherit whatever the field day produces.
What we need to quote or schedule
The intake for 3D laser scanning is short. Give us the site address, the approximate area or floor count, whether the scope is interior, exterior, or both, the deliverables you want, your timeline, any access restrictions, and any existing drawings or models. From there we can confirm whether the job is field capture only, registered point cloud delivery, scan-to-BIM, scan-to-CAD, as-built documentation, or another handoff, and we can flag anything in your prep that is likely to cost field time.
When you are ready to put a date on the calendar, request a quote with those details and we will build the capture plan around your deliverable.
FAQ
How does 3D laser scanning work?
A survey-grade terrestrial scanner sits on a tripod and sweeps a laser across the space, measuring millions of points per setup from the distance and angle of each return. The crew moves it through many positions so every surface in scope is seen from more than one spot. Those setups are later registered, or aligned, into one coordinate system to form a single point cloud of the existing conditions.
What is laser scanning used for on a building?
It produces a precise, measurable record of as-found conditions: floors, walls, ceilings, structure, facades, and visible equipment. That record then feeds floor plans, sections, elevations, reflected ceiling plans, a BIM model, or an archive of the site.
What is scan-to-BIM?
Scan-to-BIM is the process of turning a registered point cloud into a parametric model, usually in Revit, where walls, floors, columns, and systems are modeled as real objects to a defined level of detail. The site prep that matters most for scan-to-BIM is visibility of the geometry you intend to model, including above-ceiling areas if MEP is in scope.
How do I get as-built drawings from a scan?
As-built drawings are 2D documents (typically DWG and PDF) that describe a structure as it was actually built, drawn from the scan rather than from old design files. You get them by scanning the existing conditions, registering the point cloud, and drafting plans, sections, and elevations to your required tolerance.
Do I need to clear out a room completely before scanning?
No. You only need to expose the surfaces that matter for your deliverable. Pull storage off walls you need to measure and clear the corners that define room dimensions; the scanner can work around furniture that is not part of the scope. Tell the crew what matters and they will plan setups accordingly.